SONAR lets you assign a MIDI instrument definition to each available MIDI output and channel. The assignments you make determine the MIDI bank names, patch names, note names, and controller names that you see during your SONAR session.
Suppose that you have a Roland GS-compatible synthesizer attached to MIDI output 1. By assigning all 16 channels of MIDI output 1 to the Roland GS instrument definition, you ensure that the bank, patch, note, and controller name lists you see displayed in SONAR are the same ones that you see on the display screen of your synthesizer.
Often, you want to assign a different instrument to channel 10, which is usually used for percussion. For example, you might assign the Roland GS instrument definition to channels 1 through 9 and 11 through 16, but you would most likely want to assign the Roland GS Drumsets instrument definition to channel 10. That way, any SONAR tracks you assign to channel 10 on that output use the names of drum sets for patch names, and drum notation in the Piano Roll view. If you have several MIDI outputs, with a different MIDI module attached to each one, you would normally assign a different instrument definition to each MIDI output.
For convenience, you can assign a block of channels to one instrument and then change the assignment of one or more of those channels without changing the others. For example, you can highlight all 16 channels of the first MIDI output and assign them to the Roland GS instrument definition. Then, you can highlight channel 10 of that same MIDI output and assign it to the Roland GS Drumset instrument definition. Channels 1 through 9 and 11 through 16 on the first MIDI output will stay assigned to Roland GS.
If you only have one MIDI output, but have several MIDI modules attached to it, you can assign a few channels to each module. For example, you might have a Roland synth receiving on MIDI channels 1 through 9, a Roland drum machine receiving on channel 10, and a basic GM-compatible synth receiving on channels 11 through 16. In this case, you’d use three different instrument definitions for your one and only MIDI output.
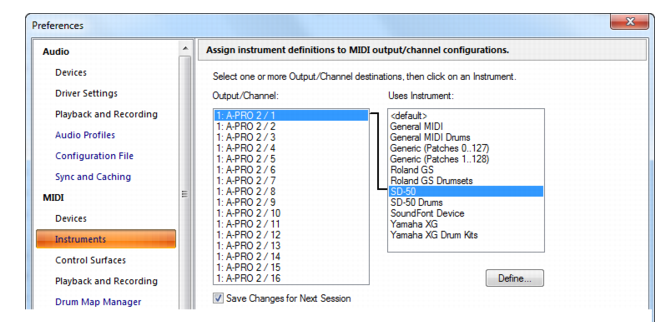
From now on, the bank, patch, controller, and note names from the assigned instrument definition are used throughout SONAR on any track that uses one of the output/channel combinations you selected in the
Output/Channel list.
You don’t really clear instrument assignments—you reassign them to use the default (General MIDI) instrument definition. After you reassign the output/channel combinations, the default (GM) bank, patch, controller, and note names are used throughout SONAR on any track that uses one of the output/channel combinations you reassigned in the
Output/Channel list.